In this article, we are going to discuss how to write a blog on Facebook.
You might have heard about creating a blog post on a website or any other similar platforms. But Facebook also allows you to write a blog post as you know that engagement rate is pretty higher in the case of Facebook. Yes, Facebook is not truly a blogging platform but still, it is a fabulous place to share your content.
Most of the Facebook content is short in length but you can create a longer one using Facebook Notes app. With Facebook Notes you can insert photos, videos, headers and many more. If you want to write a blog on Facebook and share along with friends, creating Facebook Page is an awesome idea.
Now, let's go through some methods on how can you write a blog on Facebook
How to write a blog on Facebook?
1. By Using Facebook Notes
To begin go to https://www.facebook.com/notes from your favourite web browser. As stated earlier, Facebook Notes offers you to create and share a longer form of content. It even includes various formatting tools like numbered lists, bullets, media embedding and text stylizer.
Here is how can you start writing a blog on Facebook using Facebook Notes.
• You can also find Facebook Notes going to your profile and clicking the "More" option.

• Click Write a Note
You can see an option (+Write a Note) which allows you to create a blog post if you visit directly using a browser but only (+Add Note) if you visit using your profile.

• Add a cover photo (Optional)
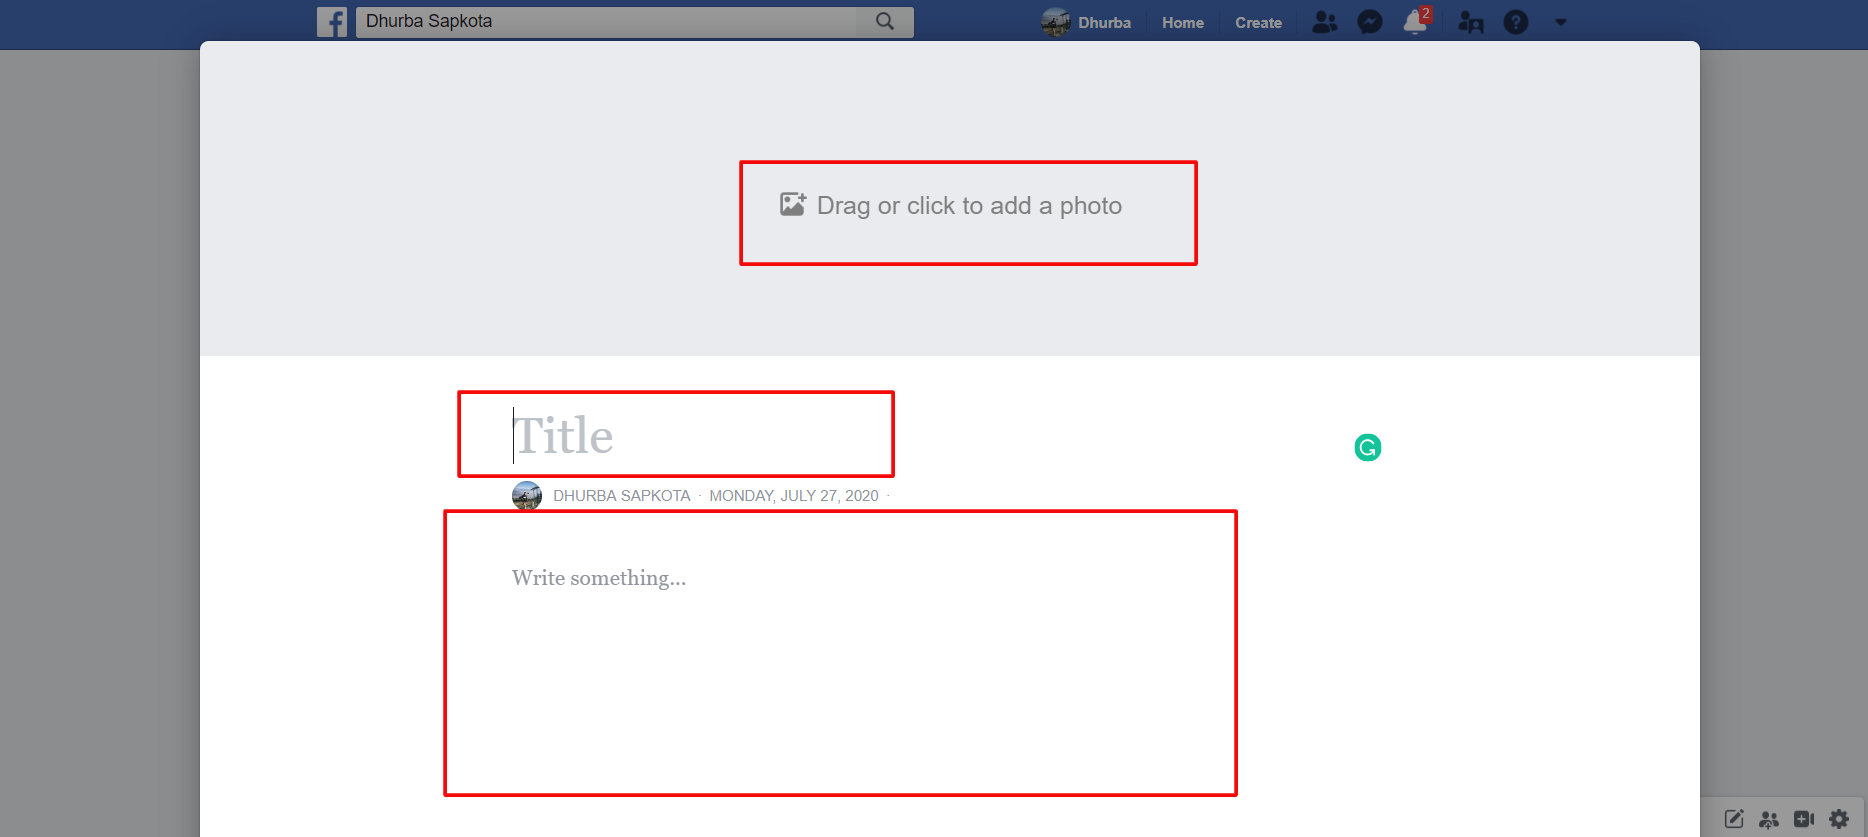
Now, you will see " Drag or click to add a photo" option to add your cover photo. This process is optional but you can add a cover photo to make your blog post stand out.
• Create a title for your post
Below the cover image, you can find the "Title" field which allows you to enter a title for your post.
• Write your blog post
Write your content inside a larger typing area or you can even create content in Word or Notepad and paste it inside the box. Some features available are as follows
o Clicking on small paragraph icon in the left of typing area opens editing options like headings, lists, HTML tags etc.
o You can add photos or embed video by clicking (+) icon next to typing area.
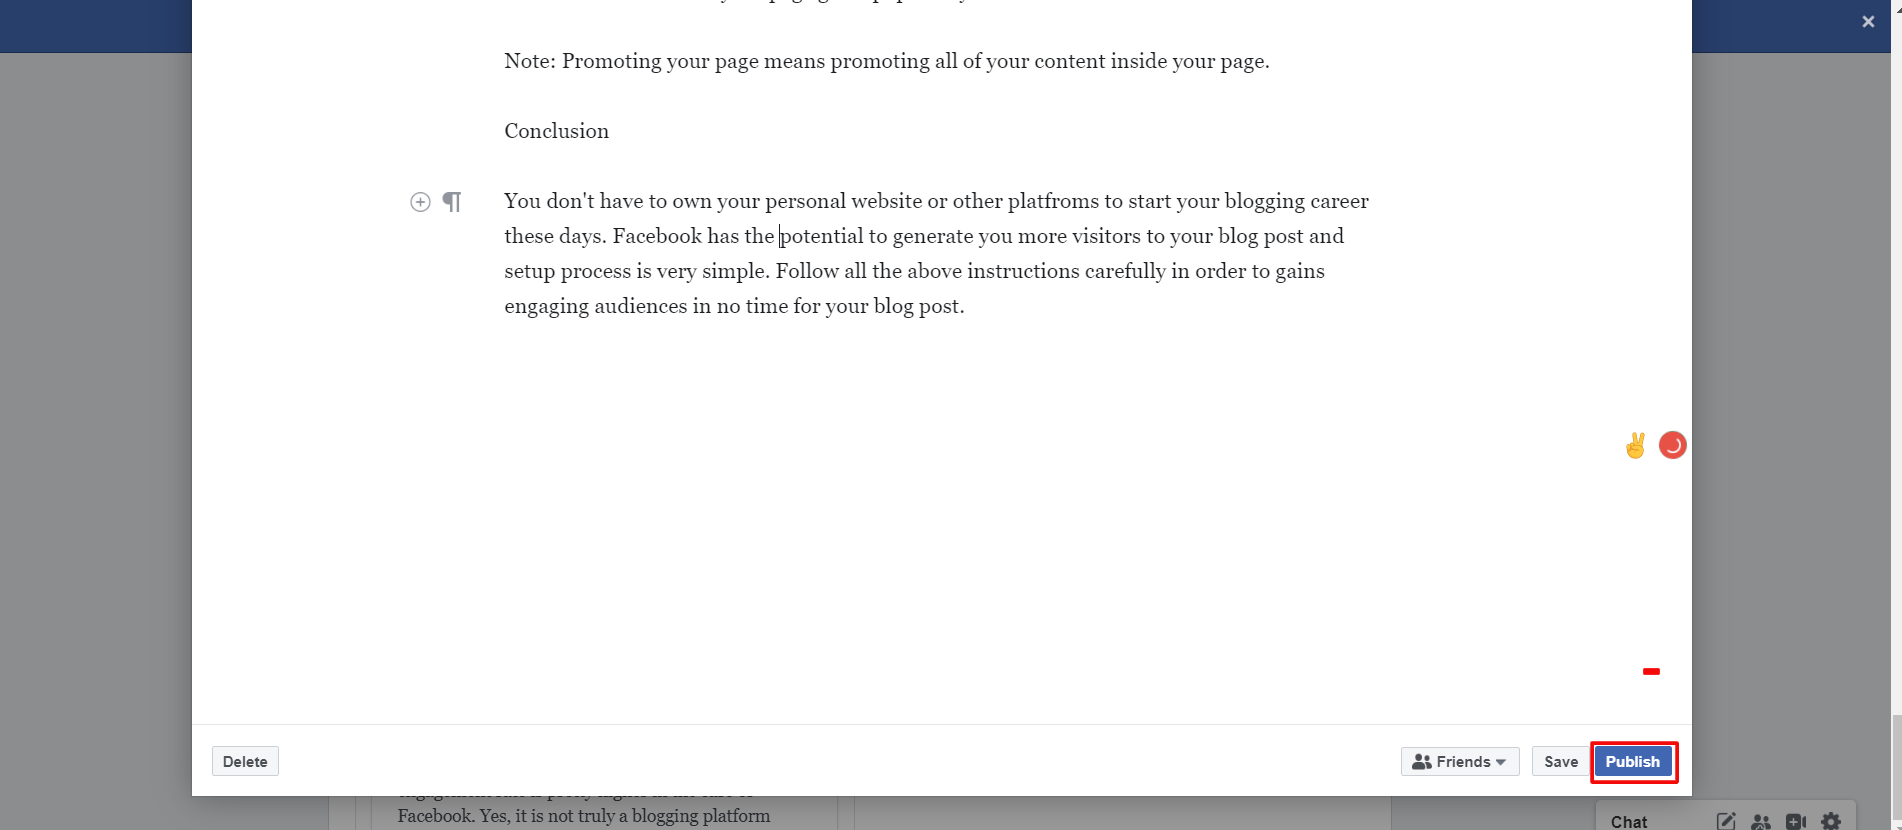
o You can click the " Save" button available at the bottom right corner so that you won't lose your content.
• Select audience
At the bottom-right corner, you will see Privacy Menu which allows you to select who can view your blog post. Select appropriate options from the menu.

• Finally click Publish
Review your content once again and hit the " Publish" button at the bottom-right corner. Now, your blog post will be visible to the audiences you selected above. Now, link to the post will appear on your profile like your regular status.
Note: Go to https://www.facebook.com/notes and select " My Notes" to view your blog.
2. By using Facebook page
If you want to write a blog on Facebook using Facebook page, you will need to have a Facebook account. Consider creating a Facebook account if you don't. You can create your blog Fan page to write a blog on Facebook. Let's go through some steps on how to write a blog on Facebook using the Facebook page.
• Click (+) icon to create a page
You can find this option at the top of the Facebook page in both classic and new version of Facebook. You can find the " Create" option in the classic version and (+) icon in the new version and select " Page".

• Click Get Started under Business or Brand section
Now, under Business or Brand section click " Get Started". Why this option? It is because your blog is your business or brand. Now, enter your page name and select the category. You can give any catchy name under the " Page Name" section and select " Blogger" or " Personal Blog" under the category.

• Upload page picture
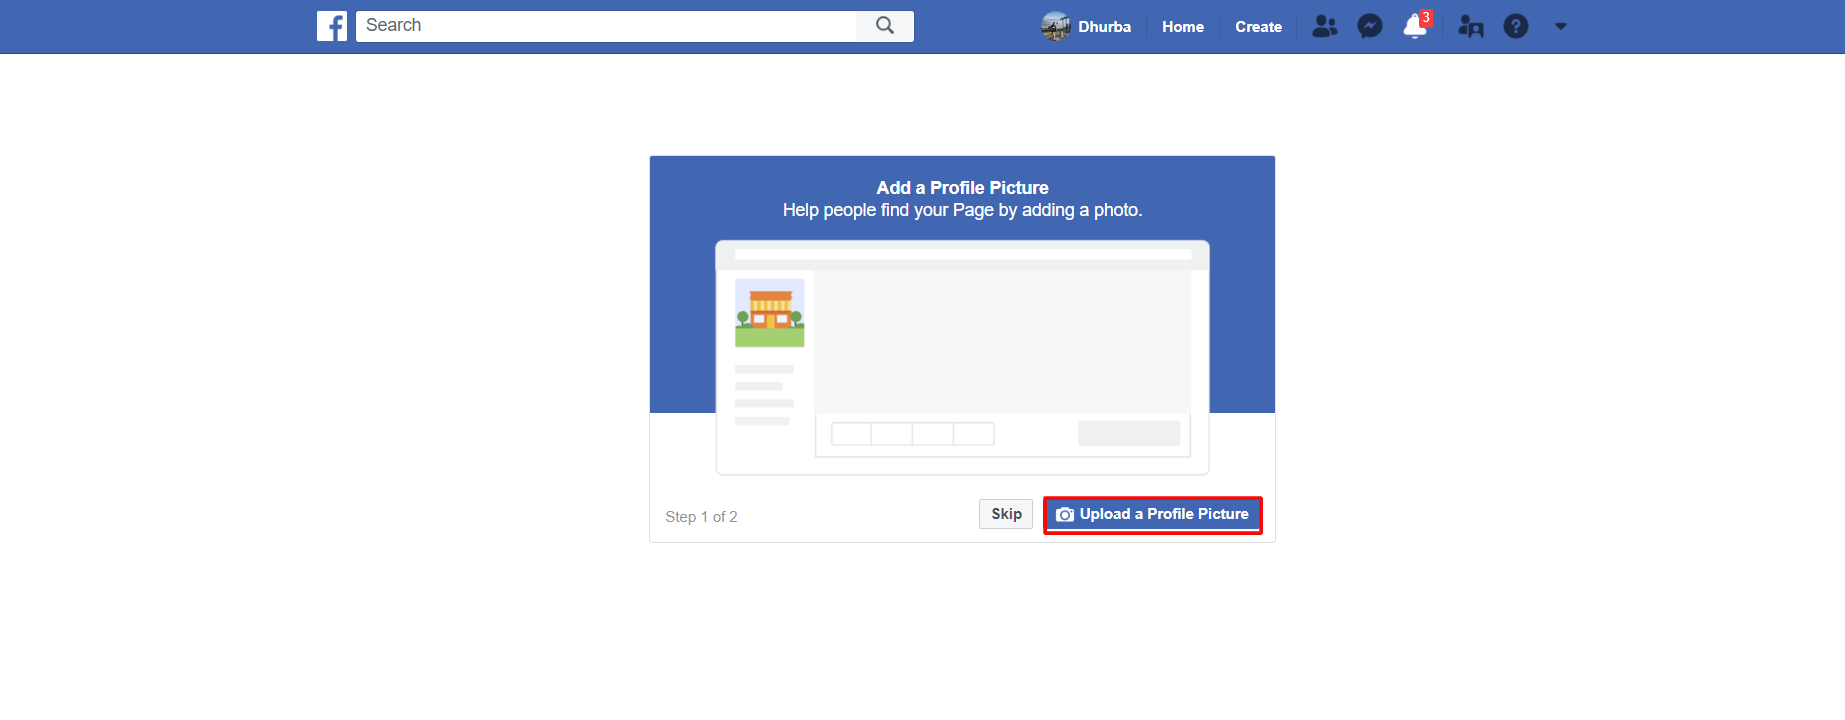
Now, you will see the option to upload a profile to your page. Make sure to upload any image that is related to your blog. It is even fine to upload your own picture or your brand's logo. The picture you upload should provide a good impression to your viewers about your page. If you don't have an image to upload currently, skip this process as you can upload it later.
• Upload cover image
Facebook page is very similar to your personal profile where you can upload a cover image too. Make sure to upload a professional-looking image that is related to your blog. If you don't have an image to upload currently, skip this process as you can upload it later.

• Change your page URL
Now, your page will be created and one of the first task to accomplish is to change your page's URL.
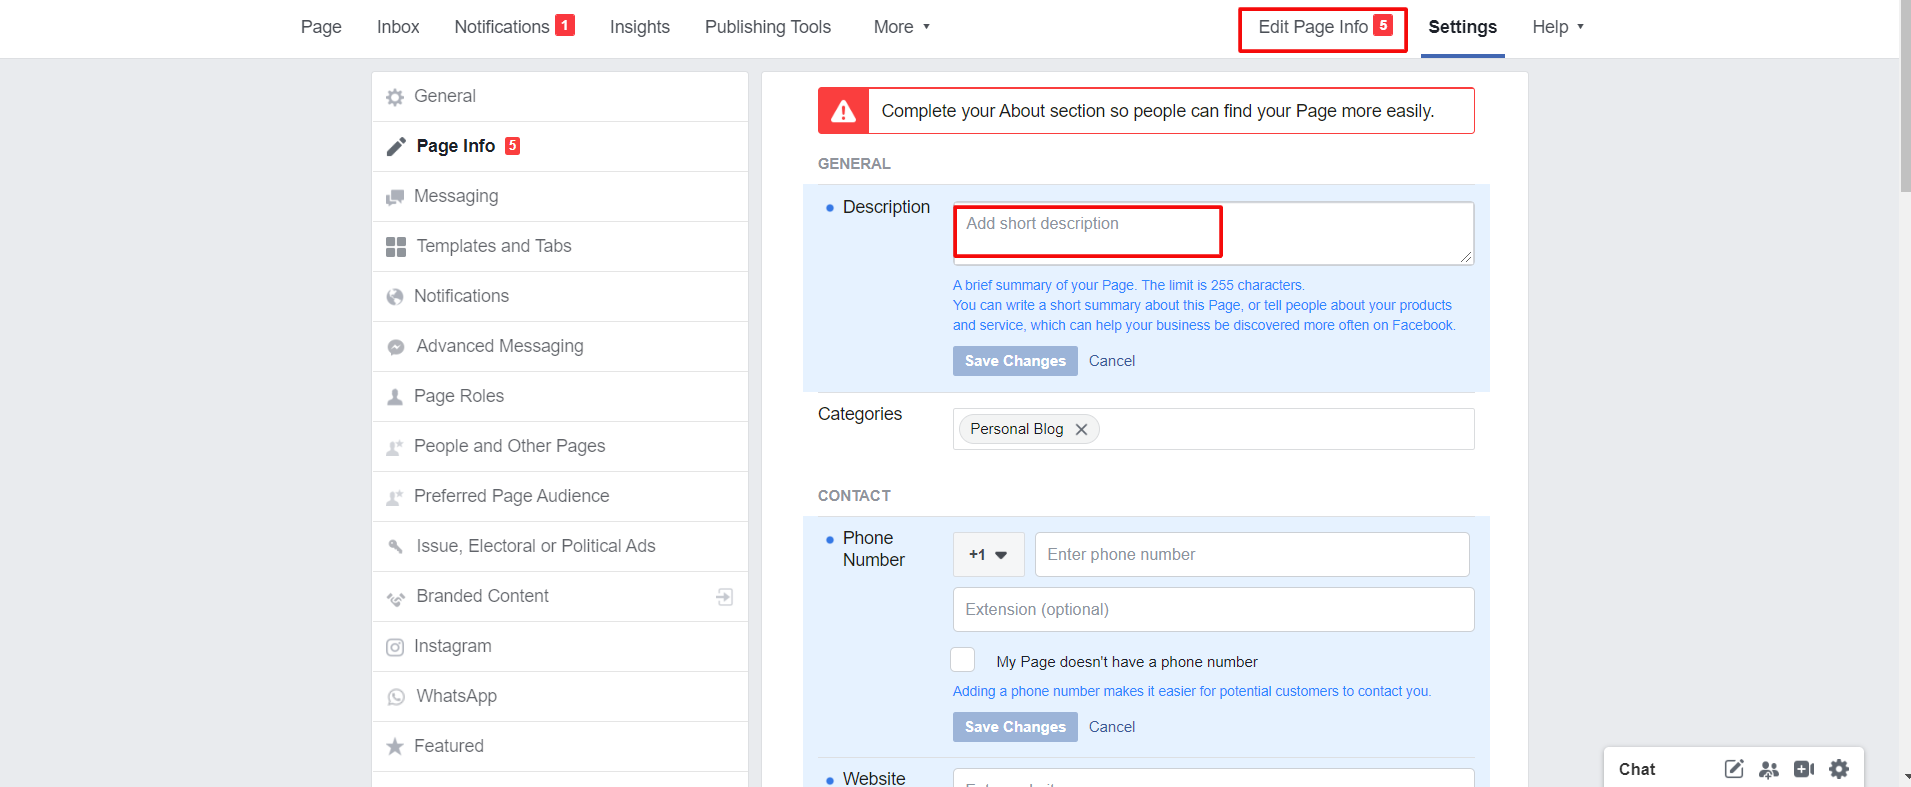
Changing your URL can make it easier for users to remember your page. If you are using the classic version of Facebook you see this option in the left panel by clicking to " See More>>About. Now, in a GENERAL section, you can create page username in " Username" section. Click it and input the username. You can find this option in the " Edit Page Info" section in a new version of Facebook.
Your page URL now will change according to your username. If you put your username technicalaide, it will your page URL will look like www.facebook.com/technicalaide.

• Add " Description" of your blog
Now, add a short and sweet description of your blog as it provides a quick overview of your blog. Your description must be appealing as it is the first thing that viewers will see. Make sure to include everything within 255 characters. You can add a description from " Add a short description" by going to the home page.
• Fill other information about your page
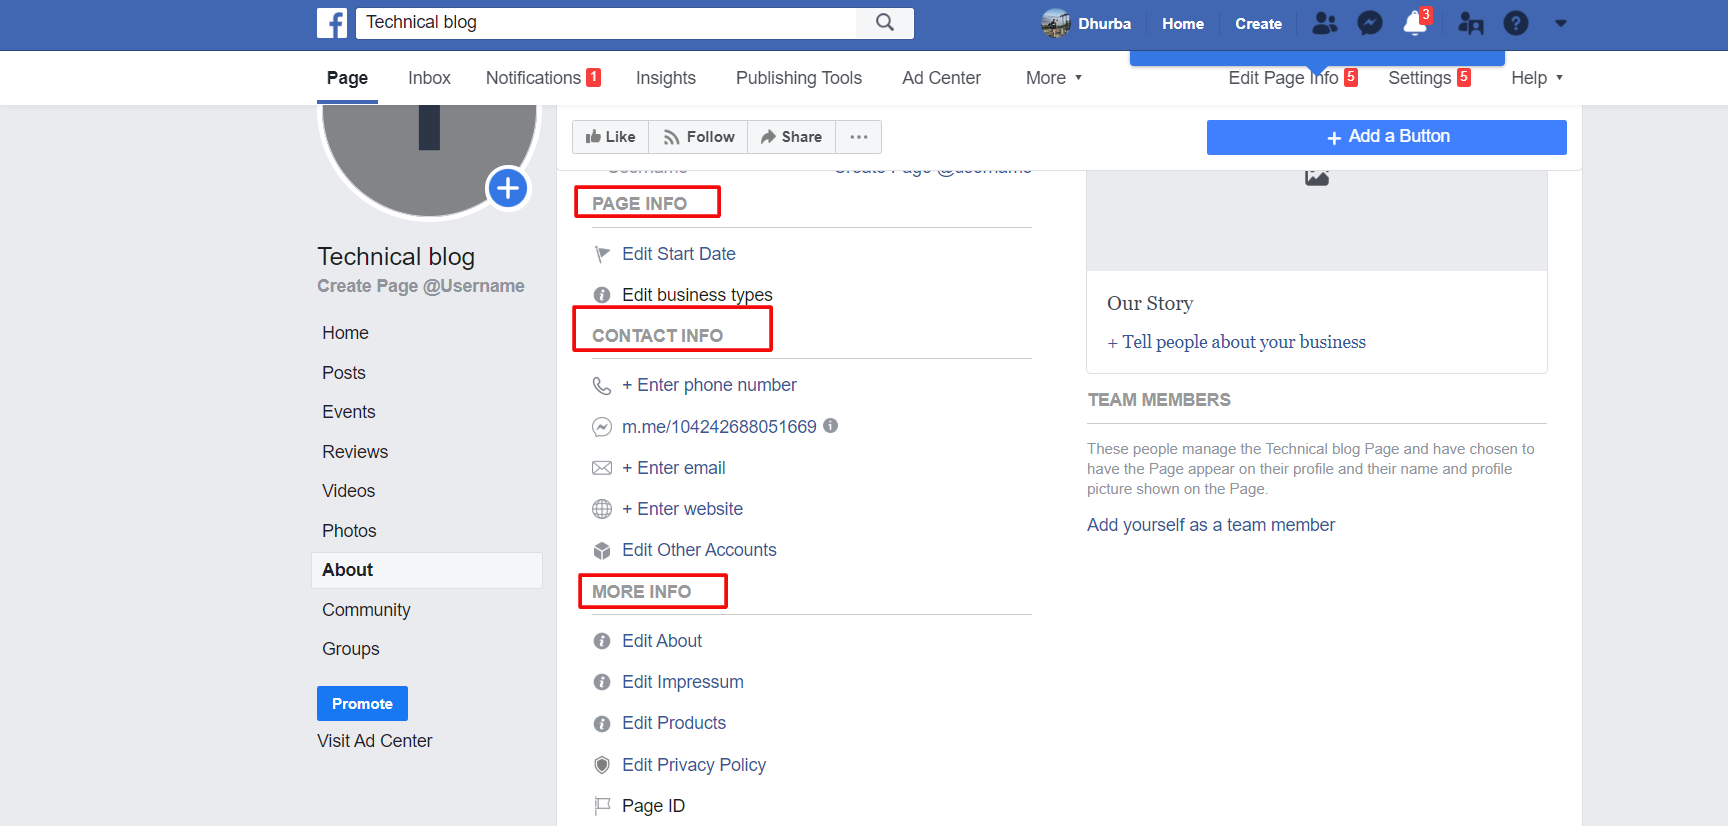
In the case of the classic version of Facebook, you can find this option under " About" tab and under " Edit Page Info" in the New version. Fill as much as possible so that your visitor will get more information about your blog.
You don't have to fill your personal information like phone numbers but make sure to provide all the information related to your blog.
• Invite people
After creating your page perfectly, its time to invite people to like and follow your page. First, invite your friends and family within your network. Facebook allows you to search and send an individual invitation to your family and friends.
• Promote your page
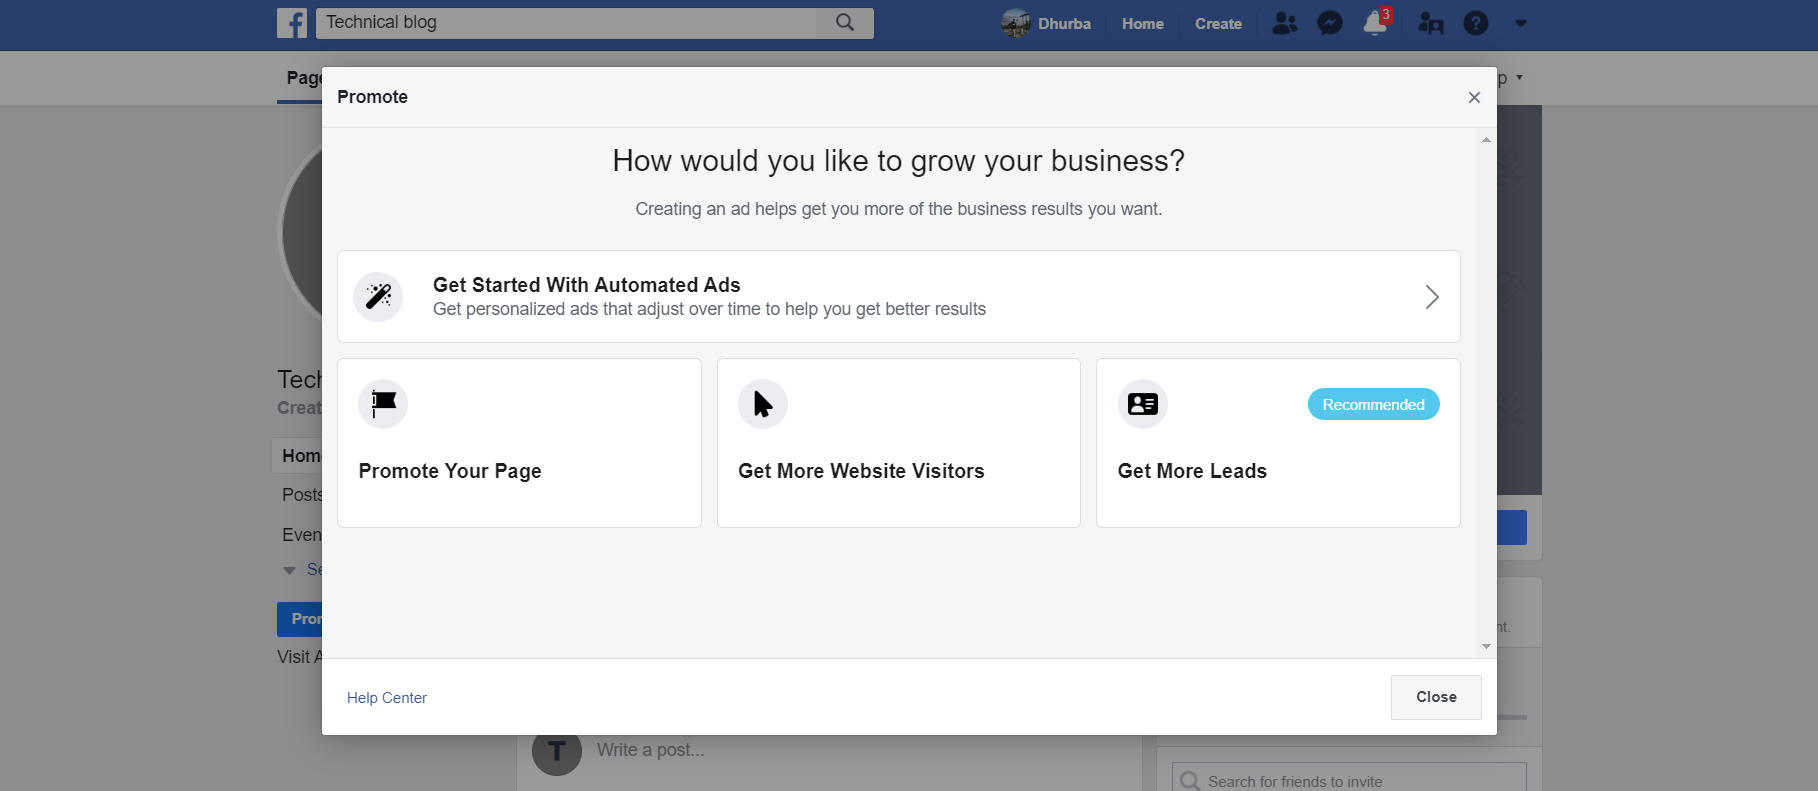
Now, your target is to reach out to a wider audience and you can do this by promoting your page. Select " Promote" option from the sidebar. Make sure to fill out all the page information and publish some blog post before promoting your page. You can see three options- Promote your page, Get More Website Visitors and Get More Leads. As a beginner starts with " Promote your page" to get more likes and wider audiences. Later you can select " Get More Website Visitors" once your page gains popularity.
Note: Promoting your page means promoting all of your content inside your page.
Conclusion
You don't have to own your personal website or other platforms to start your blogging career these days. Facebook has the potential to generate you more visitors to your blog post and setup process is very simple. Follow all the above instructions carefully in order to gains engaging audiences in no time for your blog post.


Readers Comment